
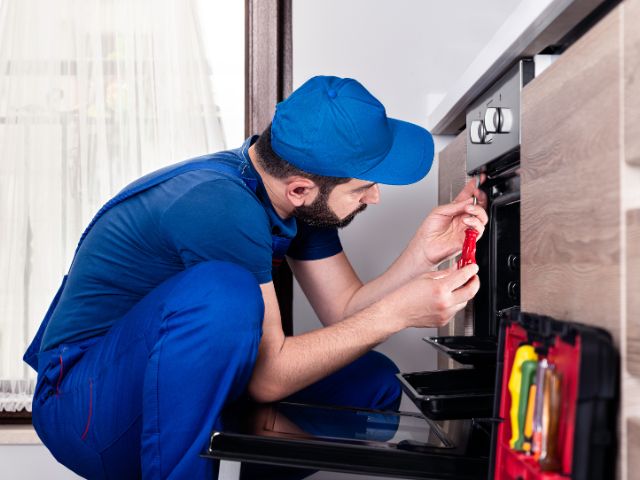
For appliance technicians in San Francisco, a Wolf oven that refuses to heat can be one of the trickiest service calls. These high-end ovens are renowned for performance, but like all appliances, they sometimes encounter malfunctions. Whether it’s a cold bake setting, uneven heating, or a completely non-heating oven, understanding the systematic troubleshooting process is critical for diagnosing and resolving the problem efficiently. In this comprehensive guide, we’ll walk through every step a technician should take to pinpoint issues, verify components, and restore optimal function.
Understanding the Wolf Oven Heating System
Before diving into diagnostics, it’s essential to understand how a Wolf oven generates heat. Most models rely on a combination of heating elements, igniters, sensors, and control boards:
- Bake and Broil Elements: Provide direct heating for baking and broiling.
- Convection Fans: Distribute heat evenly in convection models.
- Temperature Sensors/Thermistors: Communicate the internal temperature to the control board.
- Control Board: Directs power to the correct heating element based on user settings.
- Igniters (in gas models): Light burners to produce heat.
A malfunction in any of these components can result in no heat or inconsistent temperature performance. Recognizing the interplay between parts is key to targeted troubleshooting.
Safety First: Prepare Before You Begin
When servicing any Wolf oven, safety is paramount. Follow these precautions:
- Disconnect Power: Unplug electric ovens or switch off the circuit breaker.
- Gas Supply: For gas models, turn off the gas valve before inspecting burners or igniters.
- Protective Gear: Wear insulated gloves and safety glasses.
- Work Area: Ensure the oven is cool and the area is clear of obstructions.
Taking these steps protects the technician from injury and prevents further damage to the appliance.
Step 1: Verify the Oven’s Power Supply
A Wolf oven that won’t heat may simply be receiving no power. Here’s how to check:
- Confirm Outlet or Circuit: Use a multimeter to verify voltage at the outlet or circuit. Electric ovens usually require 240V; gas models may need 120V for the control system.
- Inspect the Power Cord: Look for frays, kinks, or loose connections.
- Check Fuses/Breakers: A tripped breaker or blown fuse could prevent the oven from powering its heating elements.
If the oven is not receiving proper power, the solution may be as simple as resetting a breaker or replacing a damaged cord.
Step 2: Examine the Heating Elements
Heating elements are the heart of an oven’s performance. Even a minor defect can prevent proper heating.
- Visual Inspection: Look for discoloration, breaks, or burn marks on the bake and broil elements.
- Continuity Test: Using a multimeter, test each element for continuity. A reading of infinite resistance indicates a broken element.
- Connections: Ensure that element terminals are securely connected to the wiring harness.
Replacing a faulty element often restores heat immediately, and this is a common cause of no-heat issues in Wolf ovens.
Step 3: Test the Oven’s Temperature Sensor
Temperature sensors ensure accurate heat control. If a sensor fails, the oven may refuse to heat or may cycle incorrectly.
- Locate the Sensor: Typically found in the back wall of the oven cavity.
- Resistance Check: Use a multimeter to measure resistance at room temperature (usually around 1100–1200 ohms).
- Compare to Specs: Consult the Wolf service manual for exact resistance values.
A defective sensor sends inaccurate readings to the control board, preventing heating. Replace the sensor if readings are out of range.
Step 4: Inspect the Oven Control Board
The control board manages the distribution of power to elements. Malfunctions here can prevent the oven from heating entirely.
- Visual Check: Look for burn marks, bulging capacitors, or damaged connectors.
- Error Codes: Many Wolf ovens display error codes when the board detects a fault. Cross-reference these codes with the manual.
- Voltage Output Test: Use a multimeter to verify the control board sends voltage to heating elements.
A faulty board often requires replacement, but proper testing ensures technicians don’t replace parts unnecessarily.
Step 5: Check Gas Igniters (For Gas Models)
For gas Wolf ovens, the igniter is responsible for lighting burners. If the igniter is weak or defective, burners won’t ignite.
- Igniter Glow Test: With the oven on bake, the igniter should glow bright orange within 30–60 seconds.
- Resistance Test: Use a multimeter to check resistance against manufacturer specifications.
- Gas Flow: Ensure the gas supply line is open and unobstructed.
Replacing a worn igniter often restores immediate function in gas models.
Step 6: Inspect Wiring and Connections
Loose or damaged wiring can interrupt the oven’s heating circuit.
- Wire Harnesses: Examine connections from the control board to heating elements and sensors.
- Burn Marks or Corrosion: Replace any frayed wires or corroded connectors.
- Secure Fit: Make sure all connectors are firmly seated to prevent intermittent heating problems.
A single loose wire can mimic a major component failure, so thorough inspection is crucial.
Step 7: Review Convection Fan Function
In convection ovens, heat distribution relies on proper fan operation.
- Fan Motor Test: Turn the oven on and observe the fan. If it doesn’t spin, check motor continuity with a multimeter.
- Obstructions: Remove any debris that might prevent the fan from spinning freely.
- Circuit Verification: Ensure the control board supplies power to the fan.
Without proper fan operation, even a functioning heating element may not deliver uniform heat.
Step 8: Diagnose Oven Door Seals
A seemingly simple issue like a poor door seal can drastically affect heating efficiency.
- Inspect Gaskets: Look for cracks, tears, or gaps along the door seal.
- Alignment Check: Make sure the door closes fully and latches securely.
- Heat Loss Test: A thermometer inside the oven can reveal significant heat loss.
Replacing a damaged gasket restores proper heat retention and ensures accurate cooking temperatures.
Step 9: Calibrate the Oven Temperature
Even if all components are functioning, miscalibration can lead to the perception that the oven won’t heat.
- Thermometer Test: Place an oven-safe thermometer inside and set the oven to a standard temperature.
- Compare Readings: If the actual temperature deviates significantly from the setpoint, recalibrate according to the Wolf manual.
- Control Board Adjustment: Some models allow software or manual adjustment for temperature correction.
Proper calibration ensures consistent, predictable heating for users.
Step 10: Document Findings and Communicate With the Client
After completing troubleshooting:
- Document Tests: Record all measurements, replaced parts, and error codes.
- Explain Repairs: Clearly communicate what caused the heating issue and how it was resolved.
- Preventive Advice: Offer tips such as regular element inspections or cleaning sensor contacts.
Clear documentation not only supports warranty claims but builds trust with homeowners and property managers.
Common Wolf Oven Heating Issues and Solutions
| Issue | Likely Cause | Technician Solution |
| Oven won’t heat at all | Faulty heating element, blown fuse, control board failure | Inspect power, elements, and board; replace defective parts |
| Oven heats intermittently | Loose wiring or failing control board | Tighten connections; test and replace board if needed |
| Uneven baking | Convection fan not operating or faulty sensor | Test fan motor and sensor; replace defective components |
| Error codes displayed | Sensor or board malfunction | Diagnose via manual; replace faulty part |
| Gas oven won’t ignite | Weak igniter, gas supply issue | Test and replace igniter; check gas valve and lines |
This table helps technicians quickly match symptoms with probable causes, streamlining the repair process.
Maintenance Tips for Long-Term Oven Performance
Preventing future heating problems is as important as fixing current ones. Share these tips with clients:
- Clean Heating Elements and Oven Cavity: Prevents buildup that can affect temperature sensors.
- Check Door Seals Regularly: Maintains efficient heat retention.
- Inspect Sensors and Igniters: Routine checks catch early signs of wear.
- Avoid Overloading Ovens: Excessive cookware can restrict airflow and strain elements.
- Professional Servicing: Schedule annual inspections for high-end ovens like Wolf models.
Proactive maintenance reduces service calls and keeps the oven performing reliably.
Frequently Asked Questions
- Why won’t my Wolf oven heat even though it turns on?
Likely causes include defective heating elements, a faulty control board, or a failed temperature sensor. - Can I troubleshoot my Wolf oven myself?
While minor checks like power supply and visual inspections are possible, most heating issues require a trained technician due to high voltage and gas components. - How long does it take to repair a non-heating Wolf oven?
Depending on the diagnosis and parts availability, most heating repairs can be completed in 1–3 hours. - Do Wolf ovens display error codes for heating issues?
Yes. Error codes can indicate sensor failure, igniter issues, or control board malfunctions. Always consult the official service manual. - How can I prevent my Wolf oven from losing heat?
Regularly inspect door gaskets, clean sensors, avoid blocking convection fans, and follow manufacturer-recommended maintenance.
Conclusion: Restore Performance With Confidence
A Wolf oven that won’t heat can be intimidating, but systematic troubleshooting makes repair straightforward for trained technicians. By following this step-by-step approach—from verifying power and testing elements to inspecting sensors, igniters, and control boards—technicians can efficiently identify the root cause and restore optimal heating performance.
For San Francisco appliance professionals, mastering these techniques ensures satisfied clients, fewer repeat calls, and enhanced expertise with high-end Wolf ovens. Whether dealing with electric or gas models, consistent application of these troubleshooting tips guarantees reliable, effective service.
Armed with knowledge, proper tools, and careful diagnostics, technicians can confidently tackle any Wolf oven heating issue, delivering the exceptional service homeowners expect.